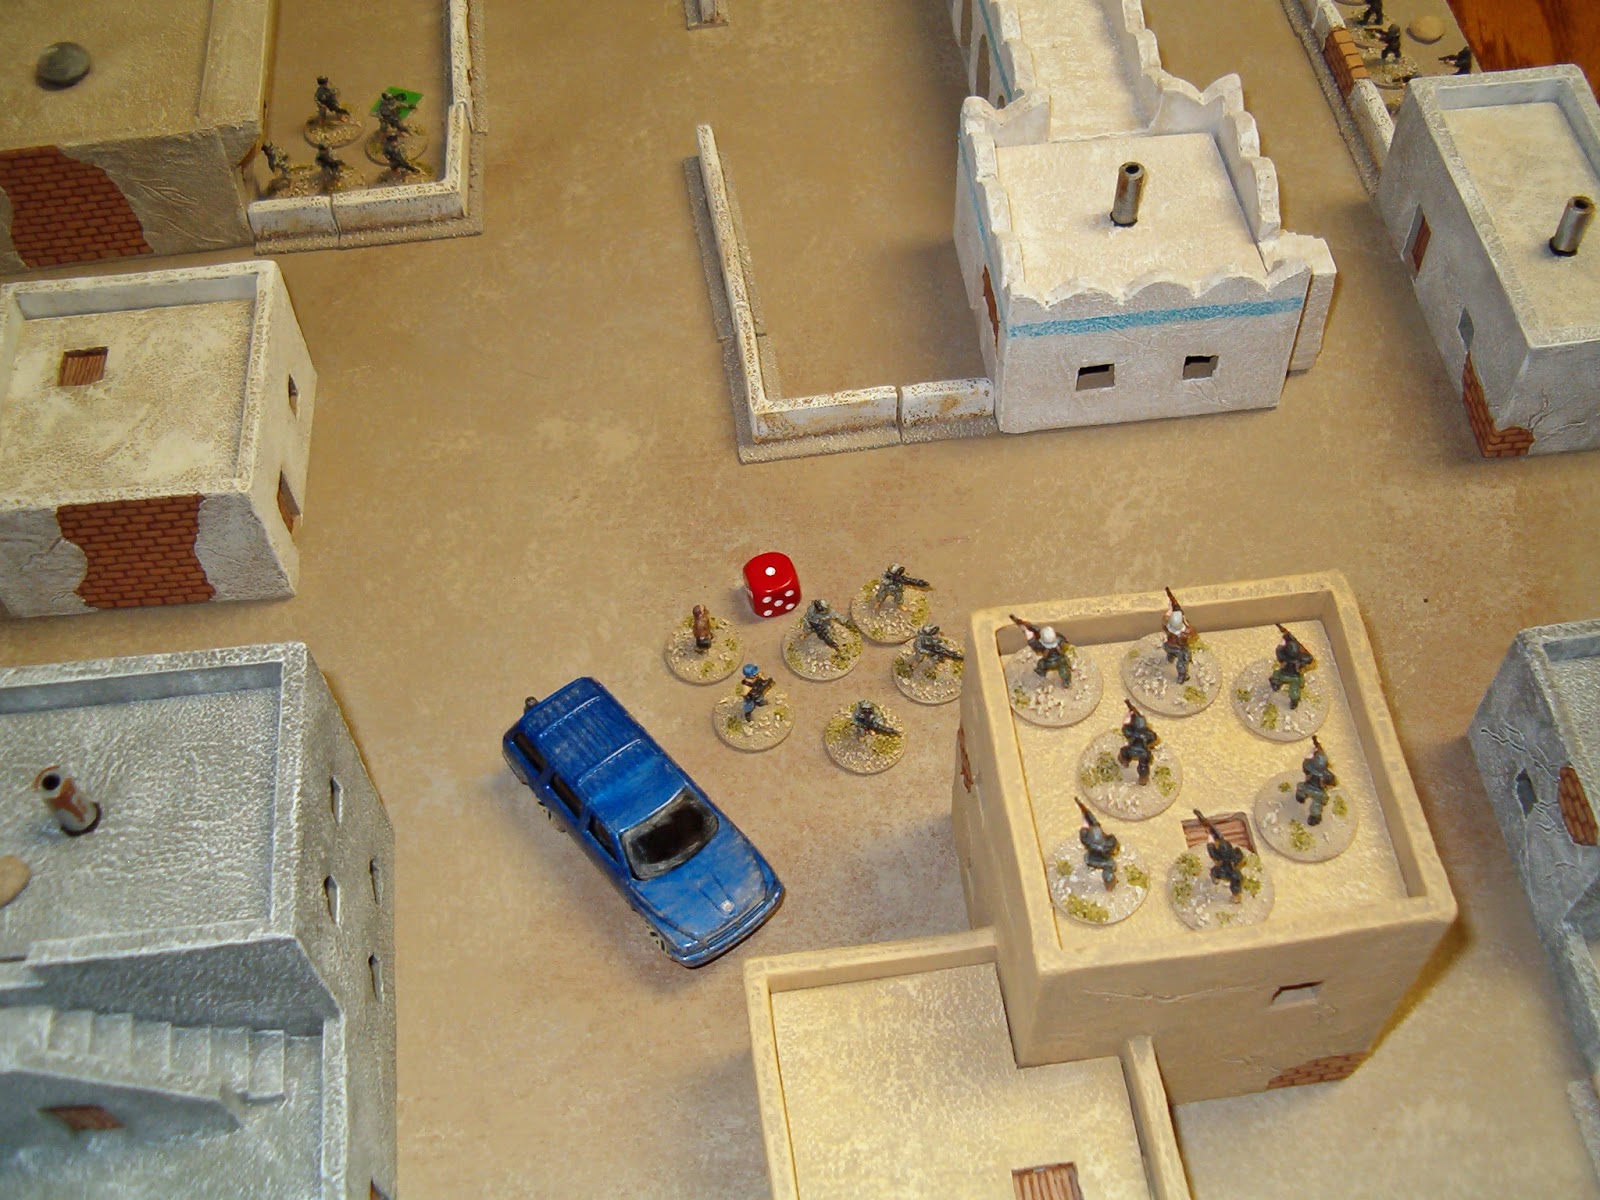
The first scenario I've worked up for Tomorrow's War is an adaptation of one of the scenarios from the rulebook. I had all the troops on hand, and with my newly finished buildings I was ready to go.
THE BIG MUDDY
Landara
Province, Kimera, 04.05.2258
As Imperial forces
advanced on the Kimeran capital city of Daiman during the Rebellion,
operations were temporarily halted by severe weather on May 2nd &
3rd. The heavy spring rains transformed the rich soil of Landara
Province into a muddy mess that made travel difficult for days
afterward.
When operations were
continued, two squads of Imperial Shock Troops were assigned to
secure a power generator facility, believed to be only lightly
guarded, that supplied power to a suburban area of Daiman where the
Imperial forces planned to station their headquarters during the
final advance on the capital. On the afternoon of May 4th, they
rolled into the area in their Strike Transport APCs expecting only
token resistance. However, while the Imperial surveillance drones
were grounded during the storms, a platoon of veteran Kimeran Defense
Force troops had occupied the facility. The Imperials found
themselves unexpectedly engaged in an intense firefight for control
of the power generator.
SCENARION
INFORMATION
Duration
of game: 6 turns
Initiative:
Imperial for turn 1, test thereafter.
Special
Conditions: Muddy Ground (see
Special Rules below).
Fog
of War: Generated normally by
Reaction Tests.
Table
Size: 2' x 2'
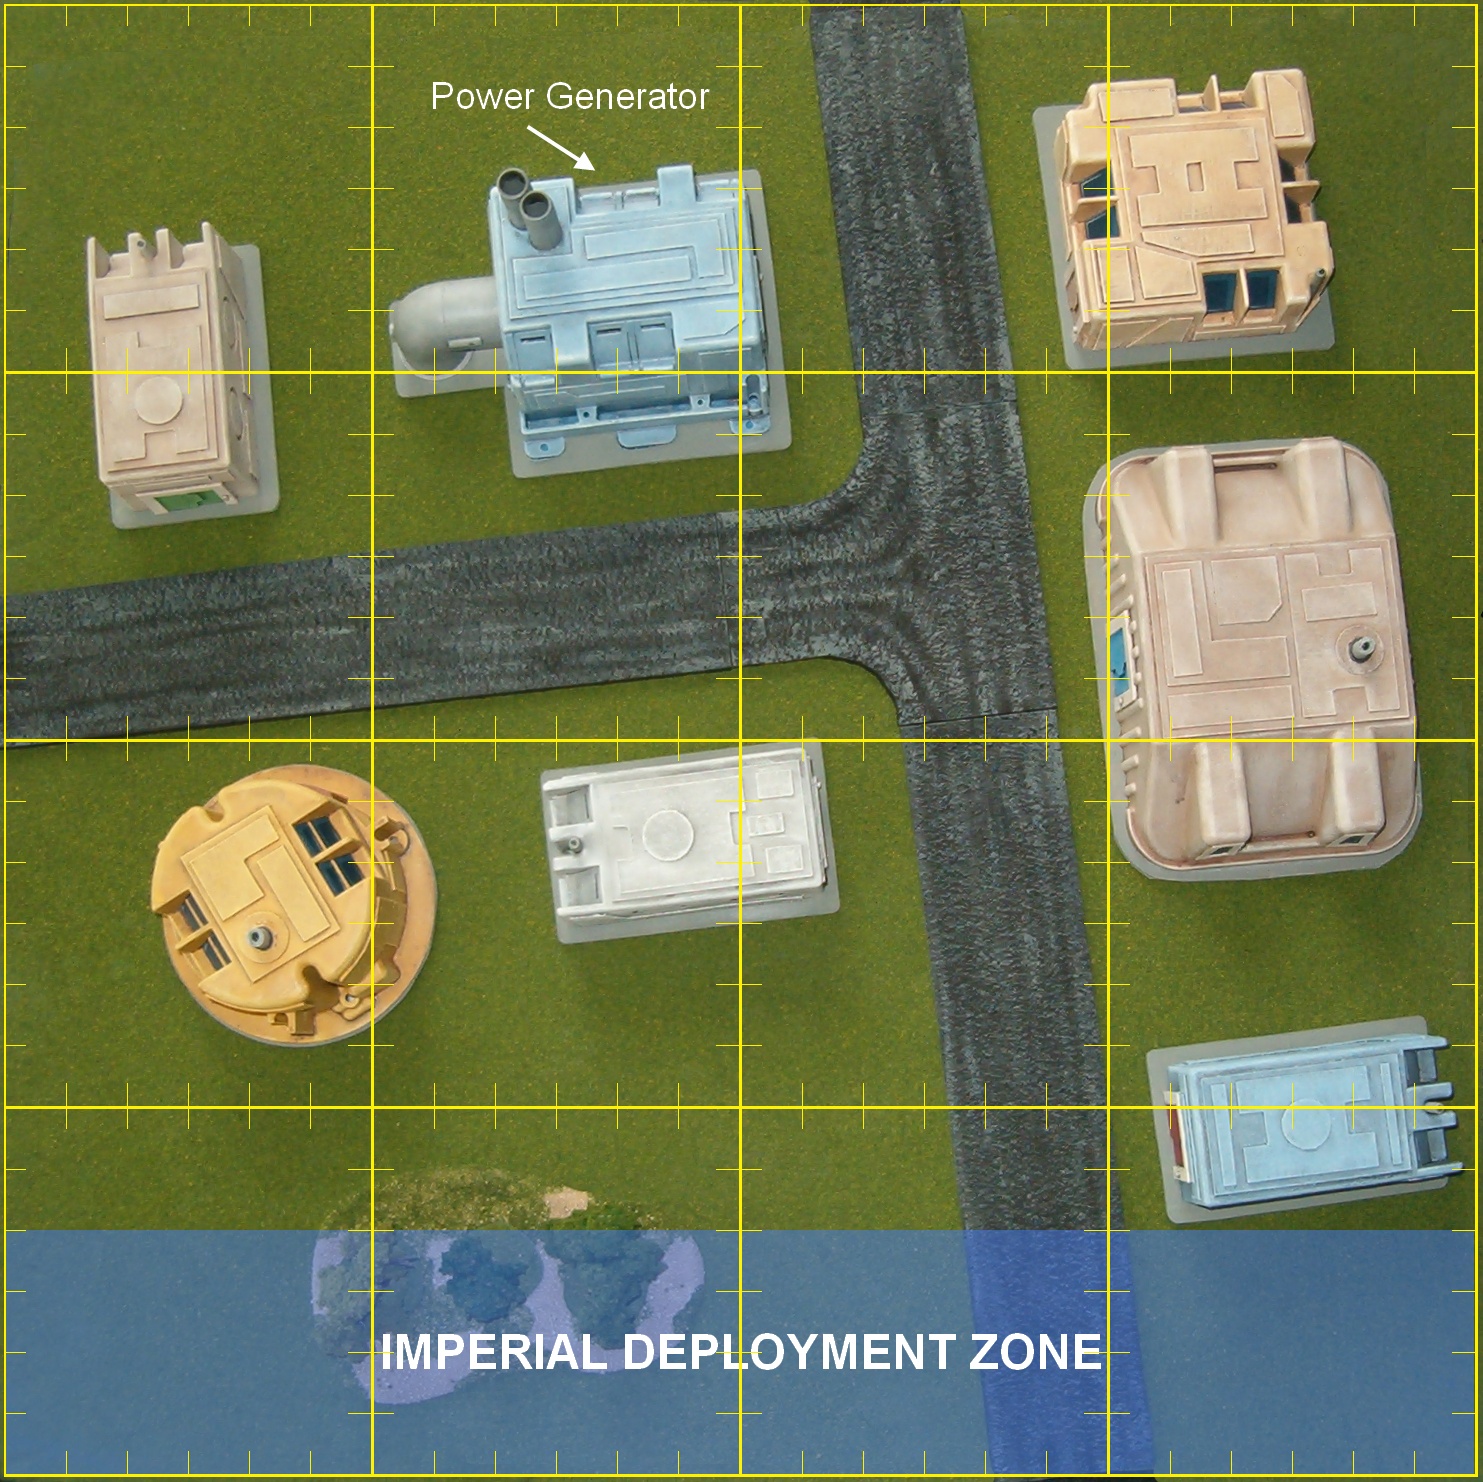
Note:
Kimeran forces set up anywhere on the board outside of the Imperial
deployment zone and may begin the game Hidden.
All
structures are Average buildings of Quality construction (6D10). If the power generator facility is destroyed by fire from the Imperial vehicles, then it doesn't count for Imperial victory points as described below.
IMPERIAL
MISSION
The objective is the
main power generator building. It's important to do as little damage
as possible to the facility, so that the generator can supply power
to the Imperial Battalion HQ when it is established. Only use the
anti-tank weapons as absolutely necessary! And be careful driving
off-road in the “Big Muddy”...
Victory
Points
-
For
each Imperial infantry unit at half strength or better within 6”
of the power generator building at the end of turn six: 5
points
For
each KDF infantry unit reduced below half strength: 1 point
For
each vehicle that fires its main gun at a building: -1 point
Imperial
Shock Troops Assault Force
Basic
Attributes
Confidence:
High
Supply
Quality: Normal
Overall
Tech Level: 2
On
Grid? No
Body
Armor: TL2, Hard (2D)
Troop
Quality/Morale: D8/D10
Fireteam
Alpha
1x Squad Leader w/Laser Rifle
1x Grenadier w/Grenade Launcher (Lt.
AP:1)
1x Gunner w/Rapid Fire Laser Support
Weapon (Lt. AP:1)
1x Trooper w/Laser Rifle
Fireteam
Bravo
1x Team Leader w/Laser Rifle
1x Grenadier w/Grenade Launcher (Lt.
AP:1)
1x Gunner w/Rapid Fire Laser Support
Weapon (LWS, Lt. AP:1)
1x Trooper w/Laser Rifle
Fireteam
Charlie
1x Squad Leader w/Laser Rifle
1x Grenadier w/Grenade Launcher (Lt.
AP:1)
1x Gunner w/Rapid Fire Laser Support
Weapon (LWS, Lt. AP:1)
1x Trooper w/Laser Rifle
Fireteam
Delta
1x Team Leader w/Laser Rifle
1x Grenadier w/Grenade Launcher (Lt.
AP:1)
1x Gunner w/Rapid Fire Laser Support
Weapon (LWS, Lt. AP:1)
1x Trooper w/Laser Rifle
Transport
2x
Strike Transport (ST-II) APCs
Imperial
ST-II APCs
Class:
Medium
Type:
Tracked
Basic
TL: 2
Weapon
TL: 2
Armor
TL: 2
Sensor
TL: 2
Front
Armor: 3D8
Side
Armor: 2D8
Rear
Armor: 2D6
Deck
Amor: 1D6
Main
Gun: Heavy Laser (TL2, LWS,
AP:4/AT:2(L)
Crew
MGs: TL2, Lt. AP:4
Secondary
Weapon: n/a
Attributes
& Notes:
Hardened
TL2 Detonation Field
KIMERAN DEFENSE MISSION
The Imperials are obviously here to
take control of the power generator facility. They have a couple
vehicles, but luckily we have a couple RPGs. We have to hold the
facility and drive off the Imperial assault force.
Victory Points
Kimeran Defense Forces
Basic
Attributes
Confidence:
High
Supply
Quality: Normal
Overall
Tech Level: 2
On
Grid? No
Body
Armor: TL2, Light (1D)
Troop
Quality/Morale:
D8/D10
Platoon HQ Squad
1x Platoon Leader w/Gauss ACR
1x Platoon Sgt. w/Gauss SAW (Lt.
AP:1)
1x Gunner w/ RPG (TL2, Med.
AP:2/AT2(M)
1x Trooper w/ Gauss ACR
Squad 1
Fireteam 1A
1x Squad Leader w/Gauss ACR
3x Troopers w/Gauss ACR
Fireteam 1B
1x Team Leader w/Gauss ACR
3x Troopers w/Gauss ACR
Squad 2
Fireteam 2A
1x Squad Leader w/Gauss ACR
1x Gunner w/RPG (TL2, Med.
AP:2/AT2(M)
2x Troopers w/Gauss ACR
Fireteam 2B
1x Team Leader w/Gauss ACR
3x Troopers w/Gauss ACR
SPECIAL RULES
The Big Muddy
Two days of drenching rain have left
the ground a swampy mess, making driving off-road difficult and
occasionally deadly, as what appears to be a big puddle may disguise
a deep sink-hole. Any time a vehicle moves off-road, it must take a
Troop Quality check. A failed check indicates some sort of mishap.
Consult the following chart:
Roll 1D6
|
Result |
1-2
|
Mud covers the
crew's vision screens, so the must rely on sensors alone. The
vehicle suffers a -1 to Reaction Test rolls.
|
3-4
|
The vehicle is
bogged down in deep mud. It may only move at half tactical speed
this turn.
|
5
|
The
vehicle drives into a deep pit – it is stuck where it is and
counts as Immobilized for victory conditions. Each
crewman/passenger must pass a Troop Quality check to avoid
becoming a casualty.
|
6
|
The
vehicle drives into an apparently bottomless sinkhole,
disappearing in a splash of muddy water. Vehicle, crew and
passengers count as Destroyed/KIA for victory conditions.
|