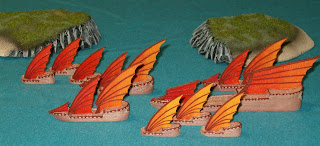
DRAGON LORDS SET SAIL!
My Dragon Lords starter fleet is now completely painted. It took me a little while longer than I had hoped, but I'm now ready to begin ridding the Uncharted Seas of the invading vermin from the Old World. I have also started to build island terrain pieces, a couple of which you can see in the background of the picture below.
Wednesday, May 26, 2010
Monday, May 10, 2010
Today's entry falls under the old adage of: "When life gives you lemons, make lemonade." I had an approximately 24" square piece of thin plexiglass, an off-cut from a poster frame, that I've been using to cover self-printed maps for gaming. It's been very handy to have around. Recently, one of my sons accidentally sat on it when I left it lying on a bed in the guest bedroom. As you can guess, it cracked right down the middle. So now, having some scrap plexiglass about, I decided to tackle a project I've had in the back of my mind for a while.
Those familiar with the game Nexus Ops will know that the center of the board features a cardboard tower called the Monolith. It stands about 2" tall, so during the game you often have to stand up in order to see what's in the hexes immediately opposite where you're sitting. This picture from BoardGameGeek shows what I mean, if you don't know the game. So I decided to see if I could construct a see-through Monolith out of my new scraps of plexiglass.
I tested several glues, and it turned out that Testor's plastic model glue did the best job. The downside being that this sort of glue is a solvent type, slightly melting the plastic to weld it together, so you have to be careful to keep it off any area you want to keep transparent. I did have to re-cut one piece after I got a gluey fingerprint on the first one.
While the glue was drying, I scanned the "roof" of the original cardboard Monolith, as it has a graphic which shows useful game info (i.e. identifying which units cannot enter the Monolith space), and printed off a copy to attach to the underside of my new Monolith.
Here are some pictures of the finished item:
Subscribe to:
Comments (Atom)


